
In my first NuoDB in Docker blog, I outlined how to deploy the NuoDB database in Docker containers. To follow that up, a second blog demonstrated how to configure scale-out and continuous availability, and how to visually monitor a NuoDB database to easily meet ever changing SQL application read and write workload demands. This third blog is for the more SQL savvy types who don’t just dabble in SQL, but work with SQL nearly every day and require the best SQL productivity tools to do their jobs better. If that is you, I trust you will find this a short, but very informative, NuoDB how-to article.
Specifically, this blog will walk through the steps on how to setup a universal GUI SQL database management and analysis tool. There are several to choose from, but I’m going to use one of my favorites—DbVisualizer (DbVis)—which creates an easy to use and intuitive SQL workbench for running SQL against NuoDB. The free edition is very useful, but you can also purchase a copy to unleash its full power.
Start Up a NuoDB Database
Using the first Docker blog, deploy the NuoDB database in Docker containers, let’s start a NuoDB database with one Admin, Storage manager (SM), and Transaction Engine (TE). However, to enable our NuoDB database to become accessible from DbVisualizer which runs outside of your local Docker network, we will make one small change when starting the NuoDB TE container. Note the use of the –publish switch in the below sample:
docker run -d --name test-te-1
    --hostname test-te-1
    --network nuodb-net
    --publish 48006:48006
    nuodb/nuodb:latest nuodocker
        --api-server nuoadmin1:8888
        start te --db-name test
            --server-id nuoadmin1
            --labels "te te1"
To confirm your NuoDB database has been created properly, type:
$ docker exec -it nuoadmin1 nuocmd show domain
server version: 6.0.1-1-019a14f800, server license: Limited
server time: 2020-01-15T09:35:11.045, client token: 85bd6ad62b6d5d13259e7b75494c325f5a344b2c
Servers:
  [nuoadmin1] nuoadmin-1:48005 (LEADER, Leader=nuoadmin1) ACTIVE:Connected *
Databases:
  test [RUNNING]
    [SM] test-sm-1-1/172.18.0.3:48006 [StartId = 0] [ServerId = nuoadmin1] MONITORED:RUNNING
    [TE] test-te-1-1/172.18.0.4:48006 [StartId = 1] [ServerId = nuoadmin1] MONITORED:RUNNING
Install DbVisualizer (DbVis)
First install DbVis on your MacOS, Windows, or Linux workstation or laptop. DbVis will use JAVA to connect to the NuoDB database. DbVis requires Java. You’ll have the option to install a copy of DbVis with or without an included version of Java. Once installed, start DBVis.
Connect to NuoDB Using DbVis
First, create a NuoDB Database Connection, which will create a connection entry in your left-bar navigation panel.
- Click <Use Wizard>
- Enter a name for your connection. I’m going to use nuodb-test because my database name is “test.” Click <Next>.
- Select the “NuoDB” Java driver. Click <Next>.
- On the next dialog, set your configuration values as below, changing only values specific to your installation, like database and password.
Note: Normally clients applications connect to the NuoDB database by first connecting to the NuoDB Admin management tier and requesting a database connection. A NuoDB Admin process then assigns the client a Transaction Engine (TE) and the connection will be established directly from the application to the database. However, in this case, DbVis (our client app in our scenario) is running outside of the Docker network, thus we are going to configure DbVis to connect DIRECTLY to a TE on port 48006. Set the database port value to 48006 (highlighted below).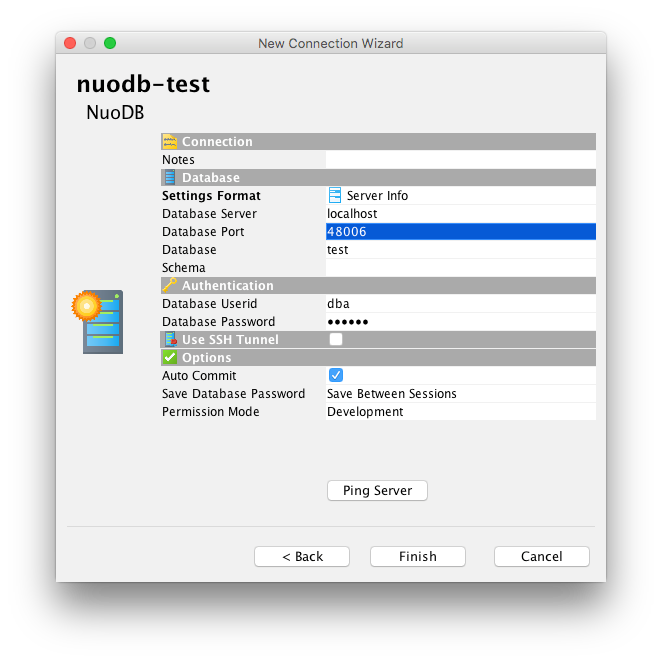
- Go ahead and click the <Ping Server> …button to ensure your database connection entry can successfully connect to the specified database server port. Then click <Finish>.
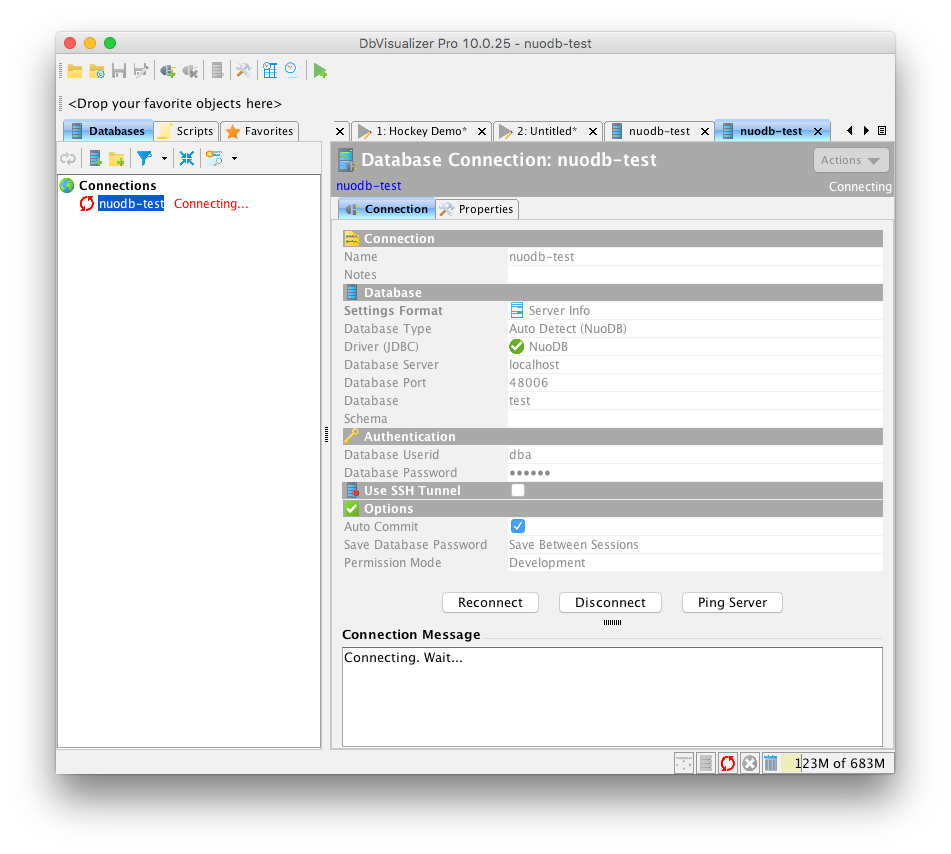
- Note, your new connection entry will not connect to your Docker database just yet. No worries, we’ll fix that! You should see a screen that looks like this:
Go ahead and click the <Properties Tab> … and enter a new driver property parameter “direct” with a value of “true” and click the <Apply> … button. Once completed, your Properties tab should look like this: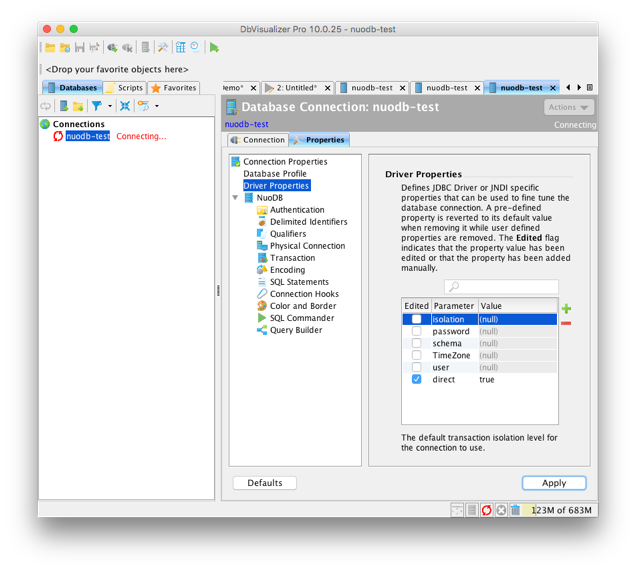
- Right-click on your db connection in the left-bar navigation window and select “Reconnect.” DBVis should now be connected to your NuoDB Docker database as pictured below!
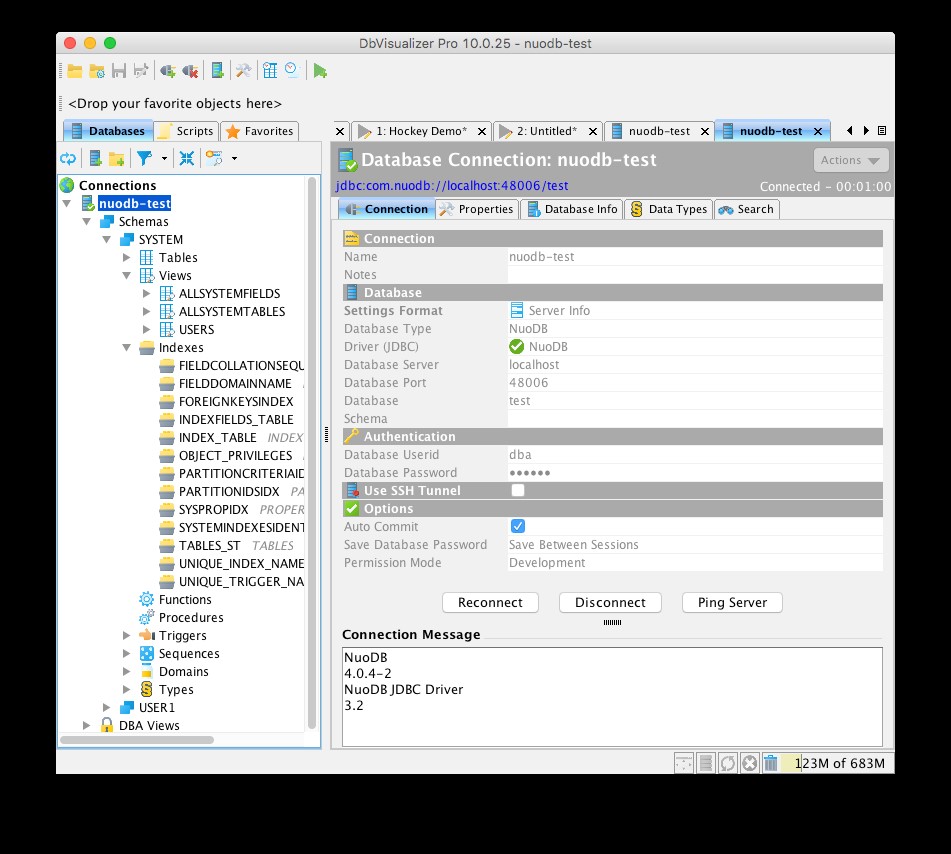
DbVis Basics
Using the left-bar navigation panel, you can now start browsing your NuoDB database data dictionary and any user created database objects, such as schemas, tables, indexes, triggers, and so on using the DbVis GUI. You can also purchase a copy of DbVis to get full management capability, create, delete, drop tables, etc.
Now on to SQL, … to run SQL statements in DbVis, click on the SQL Commander ![]() icon on the main toolbar and you are ready to enter and execute SQL statements.
icon on the main toolbar and you are ready to enter and execute SQL statements.
For more instructions on how to use DbVis with NuoDB and become a power user, see the DbVis online doc pages.
Check out more from the NuoDB in Docker blog series:

As Senior Product Manager at NuoDB, Joe drives NuoDB product releases and roadmap to continue NuoDB's cloud-native distributed SQL database leadership position which delivers scale-out and continuous availability for Hybrid Cloud Applications. Joe has over 25 years of experience delivering database products and management tools in the transactional and analytical database market place.