
There are many techniques that can be used to display geometry data. Below are some tips on maximizing the use of the Geometry Display Window.
Displaying Lots of Geometry Data All At Once
To select a lot of geometry data at once, insert the wildcard symbol (“*”) in the Group, Map, Ident, and Class columns as shown in Figure 1 below:
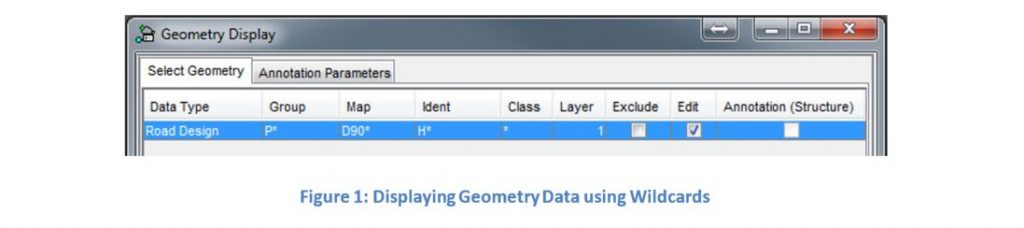
IMPORTANT NOTE: characters can precede the asterisk (e.g., “D90*”), indicating that all matching data will be displayed. However, support is not provided for either the single-item wildcard (“?”) or multiple asterisks (e.g., “*D90*”).
While using this method saves a lot of time, all of the objects are stored on the same layer (Layer 1 in this example). Individual objects can be turned off by left-clicking them in the Graphics window and using the “Hide” command from the right-click context-sensitive menu. However, as soon as the graphics window is refreshed, these objects will reappear.
Displaying Geometry Data by Individual Group & Map
Another way of differentiating between objects is to select Groups and Maps individually and assign different Layer numbers to each, as shown in Figure 2 below:
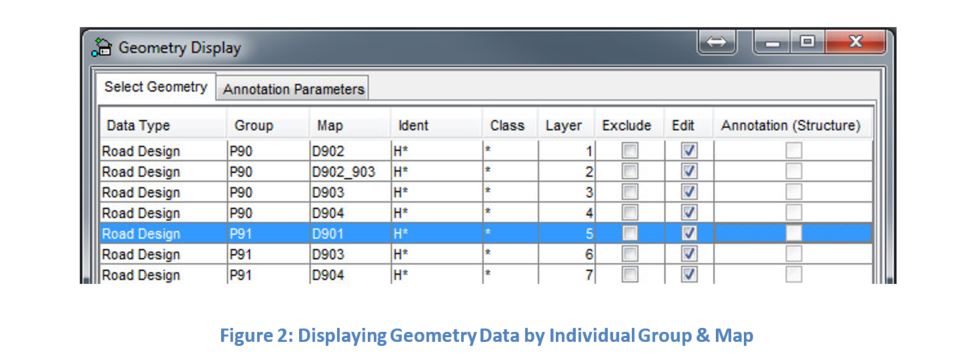
Now the user is able to turn on/off entire maps with a single click in the Exclude column corresponding to that map.
Displaying Geometry Data by Individual Ident
For the ultimate in control, where each Ident can be viewed/hidden/edited separately, the user needs to select each Group, Map, Ident, and Class individually. The easiest way to do this is to carry out the following steps:
- select all Groups
- click on each Group in turn and select all Maps
- click on each Map in turn and select all Idents
The drawback of this technique is that it is time consuming, resulting in a large number of entries in the Geometry Display window. However, it provides the user with the most flexibility in choosing what data to display, hide, or edit.
In Figure 3 below, all Idents for all Maps in all Groups have been displayed with the contents of each map on a separate layer.
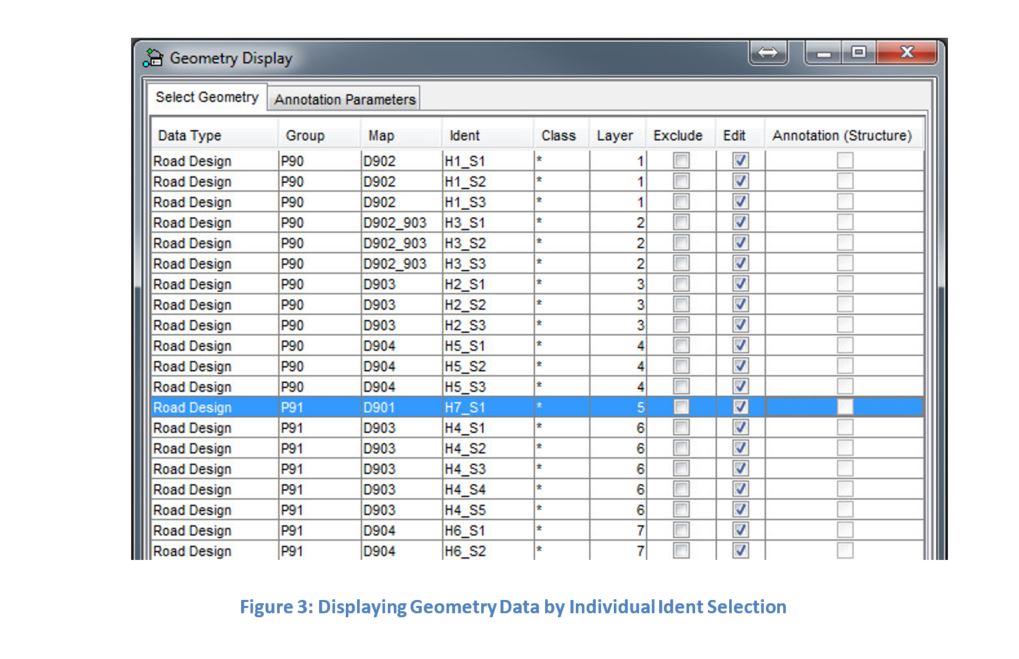
Figure 4: Displaying Geometry Data by Individual Ident Selection
IMPORTANT NOTE: the valid range of numbers in the Layer column is 1 to 9! Layer number 0 effectively turns off (i.e., hides) the data in that row, having the same effect as if the Exclude switch in that row were activated.
Excluding Multiple Geometry Data Items by Individual Ident
To exclude multiple Idents (for example, all the Idents on the same layer), the user may individually check the Exclude column corresponding to those Idents. However, there is a faster technique. Assuming that they are on contiguous lines, the following steps can be carried out:
- Left-click the Group, Map, Ident, Class, or Layer field, or
- Left-click in the white space on either side of the checkbox in the Annotation (Structure) column of the first line of the data to be excluded (see Figure 4 below); or
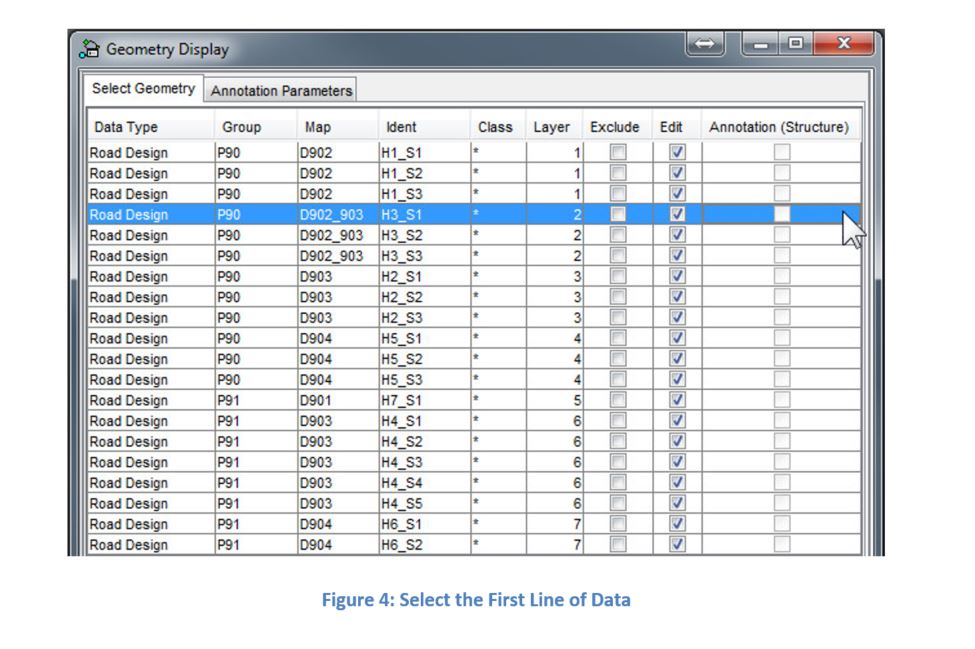
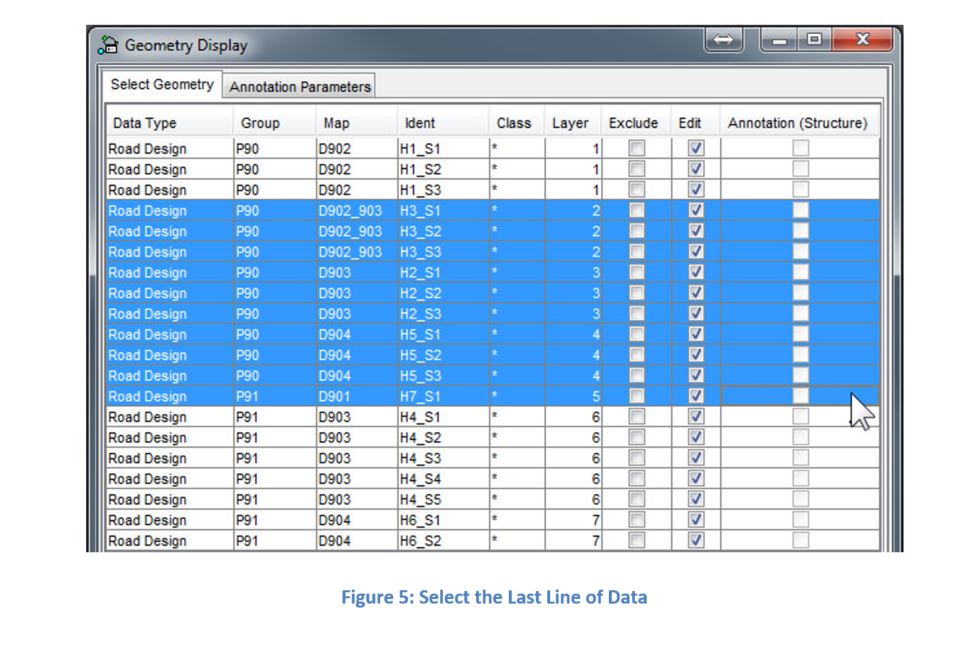
- Holding down the Shift key on the keyboard, left-click the last line of the range of data to be excluded (see Figure 5 below); or
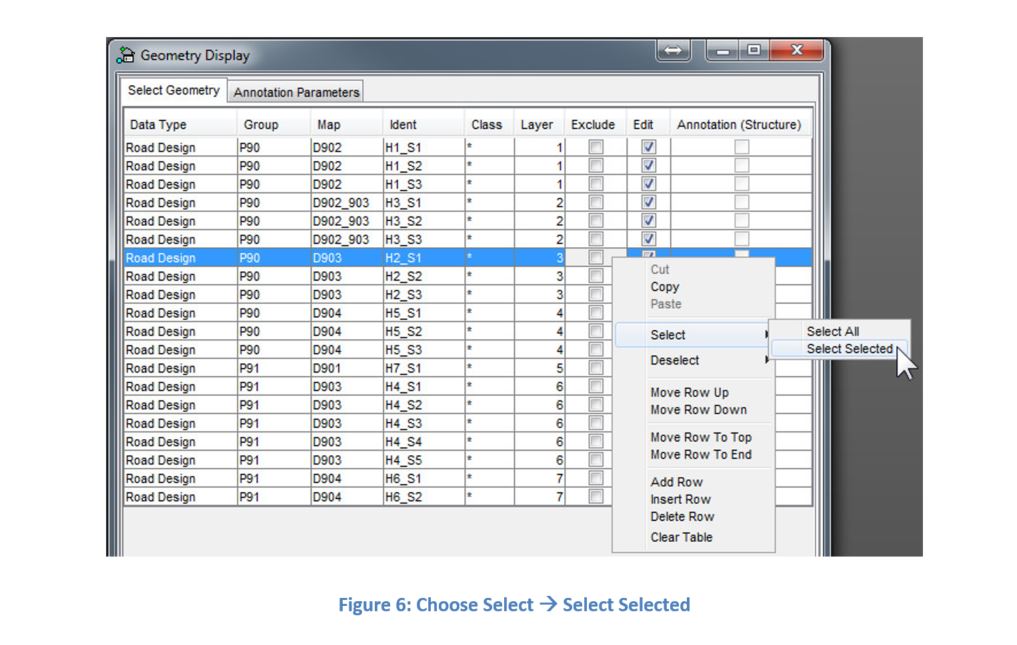
- Release the Shift key, right-click in the white space on either side of the checkbox in the Exclude column of any of the selected lines (note: even if the highlights disappear from all the lines except the one that has been right-clicked, the selected lines are still in memory), and then choose Select > Select Selected (see Figure 6 below)
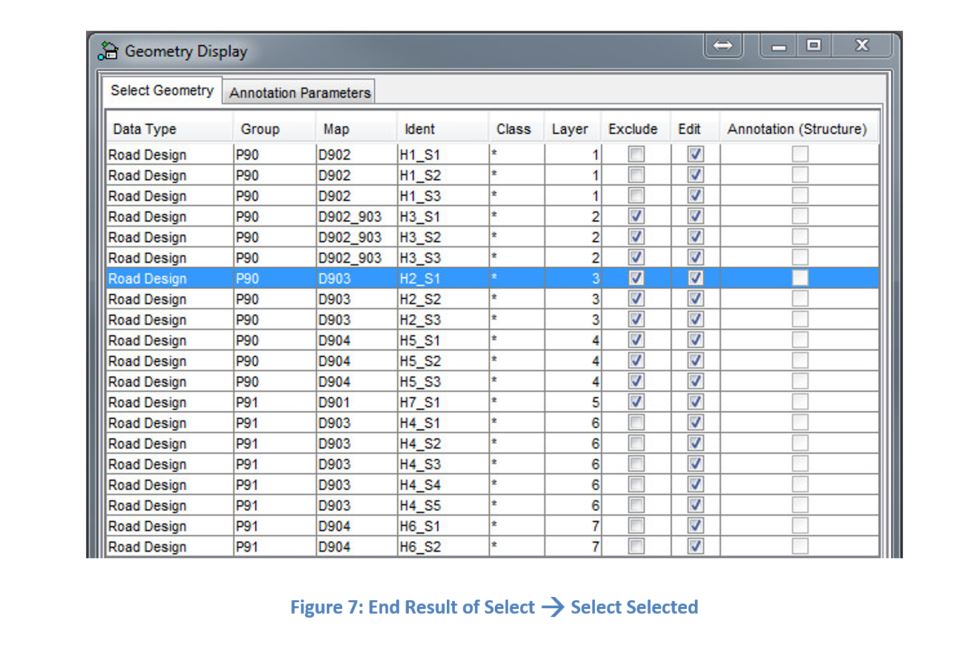
 The result is that a check mark will appear in the Exclude column for all of the selected lines (see Figure 7 below).
Other Right-Click Options
Depending on which Idents have been previously chosen, there are other right-click options available to the user. These, along with their explanation, are:
- Select > Select All: select ALL Idents in the entire table
- Deselect > Deselect All: remove the check mark against ALL Idents
- Deselect > Deselect Selected: remove the check mark against all previously selected Idents
For other Minex posts, you can check out:

Dereck has over 30 years of experience in consulting to and training GEOVIA Minex clients worldwide. He is an expert in all of the modules of Minex, and specializes in SQL macro writing and workflow automation using Tcl and VBA. Based in Florida, USA, Dereck is fluent in Spanish and English, and enjoys photography and travel. Dereck also enjoys Reggae, Calypso and Jazz music.