As a GEOVIA Minex user, you may have constrained sample or seam data while plotting, reporting or conducting statistical analysis. Such constraining may have included:
- Negative Interburden
- Depth > 200
- Thickness < 1.00m
- Bad ASH > 20
- CV >
With thousands of holes and hundreds of seams, filtering the data is often time-consuming.
Minex has a simple and elegant solution for this and that is to use FLAG SQL. Flag SQL is a simple script written in notepad and saved with the ‘.sql ‘ extension as shown below. You can copy and change variables from the text below.
FLAG SQL Script:
!Borehole-SQLMacro
! Description: This macro to find seam thickness greater than 2 m
!! Variable definitions:
EXTERNAL SEAMTH
! Setup conditions:
SELECT THICK
WHERE SEAMTH # NULL
AND SEAMTH > 5
IF SELECT THICK
FLAG 1
ELSE
FLAG 0
ENDIF
How can I use Flag SQL?
You can use it for seam reporting, during borehole plan locations and during statistical analysis and cross-correlation.
Once you have saved the above SQL script, you can proceed to follow one of the following steps.
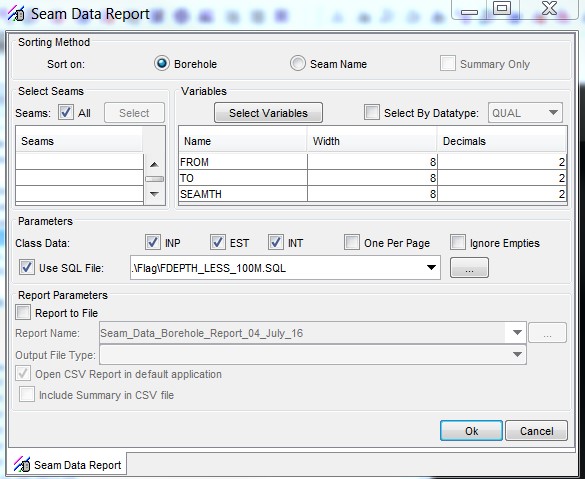
For seam reporting:
Select the appropriate variables and checkboxes under Parameters.
Check the Use SQL File box and select the FLAG SQL script you just saved.
Click OK. The seam report should honor the condition written in the script and constrain the data.

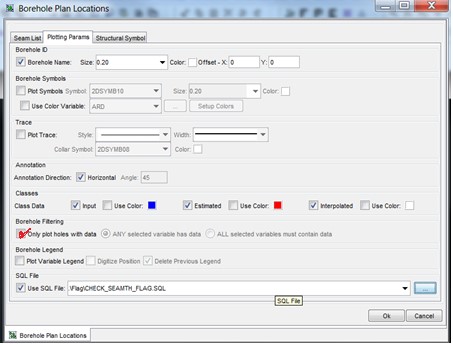
For borehole plan locations:
Under the Seam List tab (not pictured below), select your seam and variable.
Under the Plotting Params tab, check the appropriate boxes. Under Borehole Filtering, be sure to check the box Only plot holes with data.
Under SQL File, select the FLAG SQL script you saved earlier to plot the borehole with condition.

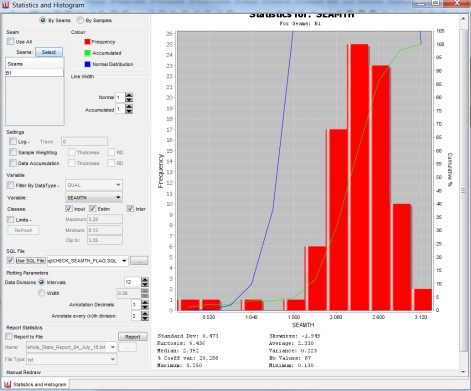
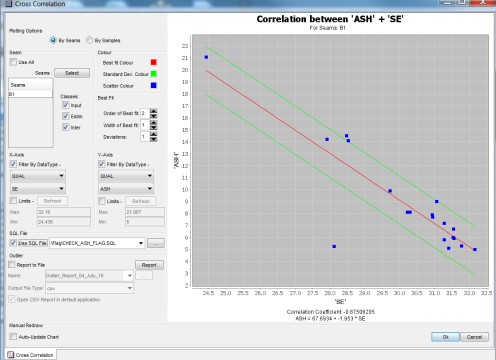
For Statistical Analysis and Cross-Correlation:
You can check the Use SQL File box and select your file, as shown below in the Statistics & Histogram screen and Cross Correlation screen.


For more Minex tips, visit:

